


This website uses cookies so that we can provide you with the best user experience possible. Cookie information is stored in your browser and performs functions such as recognising you when you return to our website and helping our team to understand which sections of the website you find most interesting and useful.
How to Convert Elementor to Bricks Builder
Convert Elementor to Bricks with 90% less effort! Read our detailed conversion guide then use our recommended tools to save 90% of manual effort and produce a performance optimized result.
Here we show you how to convert a website from Elementor to Bricks Builder. This page details the process of backing up the site, installing Bricks Builder, and optionally converting the layout and content using appropriate automation tools to save you masses of time and effort compared to a fully manual conversion.
Main Steps – Elementor to Bricks Manual Conversion
Step 1: Backup Your Website
Before making any changes, it’s crucial to back up your website:
- Backup Plugin: Install and activate a backup plugin like UpdraftPlus.
- Full Backup: Create a full backup of your live website, including files and database.
- Create Staging Site: Decide where you want to host your staging environment. There are two main options – Subdomain: e.g., staging.yourdomain.com or Subdirectory: e.g., yourdomain.com/staging
- Install Wordpress: Make a fresh Wordpress installation on your staging domain.
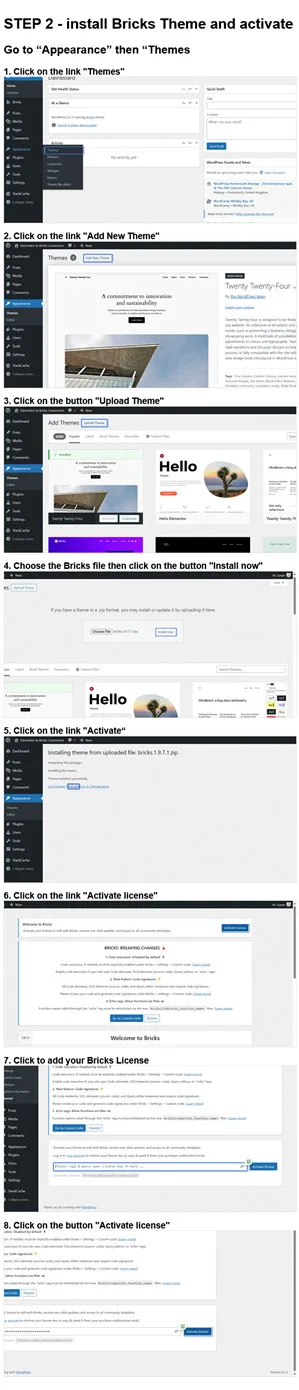
Step 2: Install Bricks Builder on Staging
- Purchase and Download Bricks Builder:
- Visit the Bricks Builder website and purchase a license.
- Download the Bricks Builder theme ZIP file.
- Install the Theme:
- Log in to your WordPress dashboard on staging.
- Navigate to Appearance > Themes.
- Click Add New and then Upload Theme.
- Upload the Bricks Builder ZIP file and click Install Now.
- Activate the Bricks Builder theme.
Step 3: Install Plugins (if required)
Bricks Builder already includes functionality for which many other page builders require external third party plugins. However a range of plugins that enhance user experience is available:
- Bricks Builder Plugins: Install any preferred plugins such as Automatic CSS, BricksExtras, Bricksforge etc.
Step 4: Export Content
- Export Posts and Pages:
- Use the WordPress export tool: Tools > Export.
- Select Posts and export them
- Repeat the process for Pages
- Import Posts and Pages:
- Use the WordPress Import tool to upload Post and Page content to the staging domain
- NOTE – This process will import posts or pages that have been created with WP. Any pages created only with Elementor will need to be manually recreated on the staging site.
- Export and Import Media:
- Use the same process to add media to the staging domain. NOTE – if difficulties are encountered with the standard WordPress export/import process, plugins such as WP All Import offer advanced methods suitable for e-Commerce products like WooCommerce.
Step 5: Analyze the Current Website Layout
Carefully examine the structure and layout of your website:
- Homepage: Note down the sections, their order, and styling.
- Other Pages: Review key pages like About, Services, Blog, and Contact.
- Global Elements: Identify headers, footers, and any global sections.
Step 6: Recreate Global Elements in Bricks Builder
- Headers and Footers:
- Open any page with Bricks Builder, click on Settings cog wheel, create your own theme style which will include your colors and typography and apply the condition to use this theme style on “entire website”
- Go to Bricks > Templates and create new templates for the header and footer.
- Recreate the design using Bricks Builder’s elements, matching the styling from Elementor.
Step 7: Recreate Pages in Bricks Builder
- Homepage:
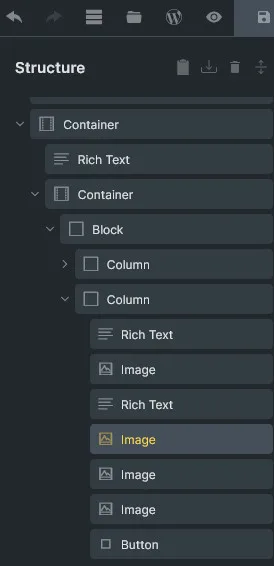
- Open the homepage in Bricks Builder.
- Add sections, columns, and elements to match the original Elementor design.
- Apply the same styles, including fonts, colors, and spacings.
- About, Services, and Other Pages:
- Repeat the process for each key page, ensuring the layout and content are accurately replicated.
- Use Bricks Builder’s elements to add text, images, buttons, and other content.
Step 8: Adjust Content
-
- Open each page with Bricks Builder and adjust the imported content to fit the new layout.
- Ensure all text, images, and other media are correctly placed and styled.
Step 9: Custom CSS and Custom Code
- Custom CSS:
- If you had custom CSS in Elementor, add it to Bricks Builder’s custom CSS section.
- Custom Code:
- If you have custom code (for example Google Analytics tracking) remember to add it to Bricks Header Scripts custom code area in Settings
Step 10: Test Your Website
- Check Functionality:
- Test all links, forms, and interactive elements to ensure they work correctly.
- Responsive Design:
- Use Bricks Builder’s responsive editing tools to adjust layouts for mobile and tablet devices.
- Test the site on various devices to ensure responsiveness.
- Performance Testing:
- Use tools like Google PageSpeed Insights or GTmetrix to analyze the site’s performance.
- Optimize as needed to improve loading times and performance.
Step 11: Final Adjustments and Launch
- Final Review:
- Conduct a thorough review of the entire website to ensure everything matches the original design and functions correctly.
- Go Live:
- Once satisfied, delete the original Elementor website, install a fresh WP instance and use UpdraftPlus to migrate the new Bricks Builder version to your live website.
Please Note – the processes outlined in this guide are for illustrative purposes and should not be construed as being applicable to all websites.
Additional Tips:
- Elementor to Bricks Builder Conversion Tools: There’s only one conversion tool we know of that will perform 90% of the conversion task: https://softlite.io/clonewebx
- Bricks Builder Community: Engage with the Bricks Builder community forums for tips and support during the conversion process.
- Automatic.CSS: The Bricks websites you convert from Elementor will be the most scalable and maintainable you’ve ever created. You can even re-theme the entire site in just a few seconds with Automatic.css
- Developer Assistance: Too busy to do the conversion yourself? Consider hiring a developer with proven experience of Elementor to Bricks Builder migration
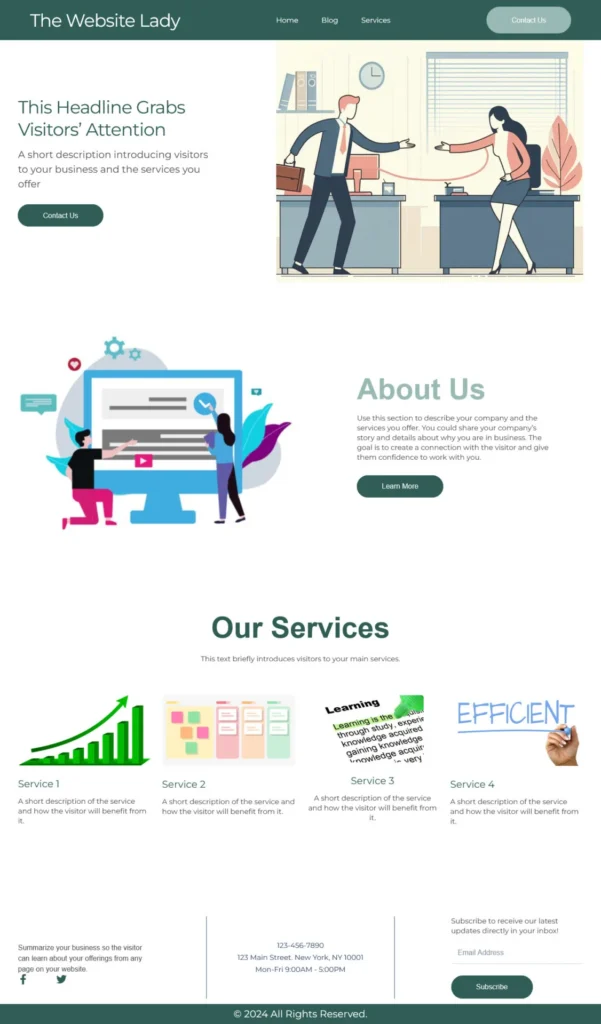
Example Elementor Website
JUST A FEW OF THOSE 100+ MANUAL ELEMENTOR TO BRICKS CONVERSION STEPS

 Find Out How AutomaticCSS Can Save You Time And Effort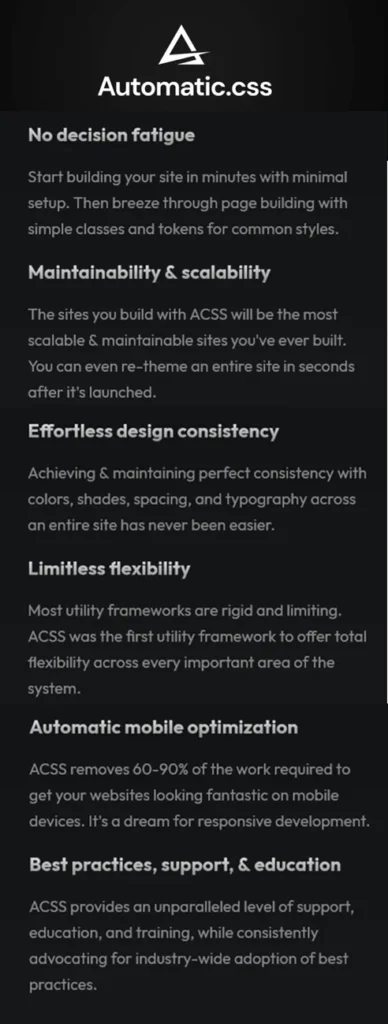


Optimizing Document Object Model (DOM) Output for Bricks Websites
Elementor is a widely-used page builder for WordPress, powering approximately 16 million websites globally. It combines user-friendliness with extensive presentation capabilities. Nonetheless, numerous users have reported slow performance issues.
This video outlines a key performance enhancement feature of the ClonewebX tool. When websites created with Elementor are converted into Bricks Builder, ClonewebX automatically fixes the common issue known as “divception” which is frequently encountered by Elementor users.
Analysis has indicated that many of the wrapping elements employed by Elementor are unnecessary and can bloat web pages, leading to performance issues. When these websites are converted to Bricks, significant improvements in performance can be delivered when compared to the original Elementor-based versions.
This is achieved by reducing the Document Object Model (DOM) output for Bricks websites, delivering a significant step forward in performance enhancement. This instructional video provides an outline guide to the process of automatically converting Elementor websites into Bricks, while at the same time significantly improving DOM performance.
Benefits of Using AutomaticCSS with Bricks Builder
AutomaticCSS (ACSS) and Bricks Builder form a powerful combination for web developers looking to streamline their workflow and enhance their website building capabilities. Below are the key benefits of using ACSS with Bricks Builder:
1. Streamlined Development Process
Utility Classes and Variables: ACSS provides a comprehensive set of utility classes and variables that simplify the process of styling elements. This means you can quickly apply styles without writing extensive custom CSS, making the development process faster and more efficient.
Consistent Design System: With ACSS, you can maintain consistency across your website. The predefined utility classes ensure that all elements adhere to a cohesive design language, reducing discrepancies and maintaining a uniform look and feel.
2. Enhanced Responsiveness
Responsive Grid Layouts: ACSS makes it easy to create responsive grid layouts with simple classes like grid–3, grid–2@M, and grid–1@S. This ensures your website looks great on all devices without complex media queries.
Breakpoint Management: The framework’s breakpoint system (small, medium, large, and extra-large) allows you to control how your layouts adjust at different screen sizes, providing a seamless user experience.
3. Improved Efficiency and Performance
Reduced CSS Bloat: By using utility classes, ACSS minimizes the amount of custom CSS you need to write. This leads to cleaner code and better performance, as there’s less CSS for the browser to load and render.
Faster Prototyping: ACSS enables rapid prototyping by allowing you to quickly apply styles and adjust layouts. This is particularly beneficial during the initial stages of design and development when changes are frequent.
4. Seamless Integration with Bricks Builder
Visual Building with ACSS: Bricks Builder is a visual page builder that pairs perfectly with ACSS. You can apply ACSS classes directly within the Bricks Builder interface, making it easy to see the effects of your styles in real-time.
Customizable Components: Bricks Builder allows you to create reusable components. By integrating ACSS, you can ensure these components are consistently styled and responsive, enhancing the modularity and maintainability of your site.
5. Accessibility and Usability
Built-in Accessibility: ACSS promotes the use of best practices in web development, including accessibility. By using standardized utility classes, you can ensure your site meets accessibility guidelines more easily.
User-Friendly Approach: The minimal learning curve of ACSS, combined with the intuitive interface of Bricks Builder, makes this combination ideal for both beginners and experienced developers. It allows you to focus more on design and functionality rather than the intricacies of CSS.
Summary
Using AutomaticCSS with Bricks Builder provides a robust, efficient, and scalable solution for web development. The combination of utility classes, responsive design capabilities, and the visual building interface of Bricks Builder enhances your workflow, making it easier to create high-quality, responsive websites with consistent design and improved performance.
Convert Elementor to Bricks: Some Closing Thoughts
You’re probably here because you’re thinking about converting your WordPress website from Elementor to Bricks Builder. With the growing popularity of Bricks Builder, many users are curious about the differences between Bricks vs Elementor. In this website guide, we’ll cover everything you need to know about making the transition, comparing the two builders, and exploring features like automatic CSS in Bricks.
Why Consider Bricks Builder vs Elementor?
When it comes to choosing between Bricks vs Elementor, many developers and designers appreciate Bricks for its speed and flexibility. Unlike Elementor, Bricks offers a more streamlined experience, allowing for faster page loads and greater customization through direct coding.
Elementor vs Bricks Builder: Key Differences
Both builders have their strengths, but Elementor vs Bricks Builder differs significantly in their approach to design and performance. Elementor is known for its user-friendly interface, which is great for beginners, while Bricks Builder is preferred by advanced users who value efficiency and performance. If you’re considering Elementor to Bricks conversion, understanding these differences is important.
Steps to Manually Convert Elementor to Bricks
To manually convert Elementor to Bricks, start by identifying the key elements of your existing site. Once you have a clear map of your content, you can begin the migration process. Fortunately, we can offer tools that facilitate this transition, ensuring that your design remains intact as well as improving performance.
Automatic CSS Bricks: Streamlining Your Design Process
One of the standout features of Bricks Builder is its support for automatic CSS. This functionality allows developers to apply global styles effortlessly, ensuring consistency across your site. With Bricks ACSS, you can take advantage of advanced styling options without manually writing code for each element. Learn How to Setup Automatic CSS with Bricks Builder.
Bricks Builder vs Elementor: Performance and Efficiency
When comparing Bricks Builder vs Elementor, it’s clear that Bricks Builder offers a leaner, more efficient platform. This difference is particularly noticeable on large sites where performance is critical. Bricks Builder’s code output is cleaner, leading to faster load times and a better user experience.
Bricks Web Builder: A New Era of Website Development
Bricks website builder is revolutionizing the way developers create and manage websites. Its modern approach and robust features make it an ideal choice for those looking to build high-performance WordPress sites.
How to Install Bricks Builder
If you’re new to Bricks, you might be wondering how to install Bricks Builder. The installation process is straightforward. After purchasing a license, download the builder from the official website, and upload it to your WordPress site via the plugins section. Once activated, you’re ready to start building.
Bricks Builder vs Divi: Which Is Better?
Another common comparison is Bricks Builder vs Divi. While Divi is known for its vast ecosystem and visual builder, Bricks stands out for its speed and developer-friendly features. Depending on your needs, either builder could be the right choice, but Bricks is often preferred for its modern approach.
Bricks CSS: Mastering Design with Bricks
Bricks CSS and Bricks Builder CSS are powerful tools that allow for in-depth customization. Whether you’re adding custom styles to individual elements or applying global settings, Bricks provides the flexibility you need to achieve your design vision.
Bricks Lifetime Deal: Is It Worth It?
For those considering a long-term commitment, the Bricks lifetime deal is an attractive option. This one-time purchase gives you access to all future updates, making it a cost-effective solution for developers who plan to use Bricks for multiple projects.
Bricks Page Builder: Building the Future
As a Bricks page builder user, you’ll benefit from a tool that prioritizes speed, efficiency, and flexibility. Whether you’re building a simple blog or a complex e-commerce site, Bricks has the features you need to create stunning, responsive designs.
Bricks WordPress Pricing: Understanding the Costs
When it comes to Bricks WordPress pricing, it’s important to consider the value you’re getting. While Bricks may have a higher upfront cost compared to other builders, its performance benefits and lifetime deal can make it a more economical choice in the long run.
Bricks WP: A Game Changer for WordPress
In the world of Bricks WP, the future looks bright. As more users switch from Elementor and other builders, Bricks is quickly becoming a go-to solution for those who want a fast, efficient, and powerful tool for WordPress development.